Table of Contents
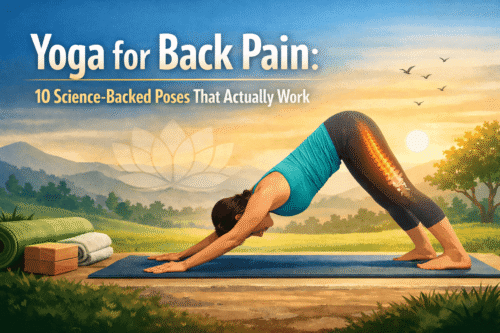
ToggleYoga for Back Pain: 10 Science-Backed Poses That Actually Work (2026 Guide)
Back pain is one of the most widespread health issues today—and one of the most misunderstood. According to the World Health Organisation the Lower Back Pain in 2020 is over 619 million people globally. This LBP will increase to 850 million by 2050.
Most people go in for temporary relief by taking painkillers, rest, or quick treatments. They are not analysing the root causes: weak muscles, poor posture, tight hips, and chronic stress.
After decades of observing both traditional practices and modern research, one thing is clear:
Gentle, consistent movement—especially yoga—remains one of the most effective long-term solutions for back pain.
In this guide, you’ll discover:
10 science-backed yoga poses
A 15-minute daily routine
Evidence from clinical studies
Practical modifications for beginners
Why Yoga Works for Back Pain (Backed by Science)
Modern research confirms what traditional systems have long understood.
A 2017 randomized controlled trial published in the Annals of Internal Medicine (320 participants) found that yoga reduced chronic lower back pain as effectively as physical therapy.
Another meta-analysis in the Cochrane Database of Systematic Reviews concluded that yoga leads to:
- Improved back function
- Reduced pain intensity
- Better mobility over time
Mechanisms Behind Yoga’s Effectiveness
Yoga works because it targets all root causes of back pain:
- Strengthens core stabilizers(glutes, transverse abdominis, erector spinae)
- Improves flexibility in hamstrings and hip flexors
- Reduces cortisol, lowering muscle tension
- Enhances body awareness and posture correction
If you’re new to yoga, start with this complete foundation:
The Ultimate Guide to Yoga for Health, Flexibility, and Mental Wellness
What is the best yoga pose for back pain?
The best yoga poses for back pain include:
- Child’s Pose (Balasana)
- Cat-Cow Stretch
- Downward-Facing Dog
- Bridge Pose
- Supine Spinal Twist
These poses improve flexibility, strengthen core muscles, and reduce tension in the spine.
Important Disclaimer
If you have conditions such as disc herniation, spinal stenosis, or severe sciatica, consult a healthcare professional before starting.
10 Best Yoga Poses for Back Pain (With Images)
1. Child’s Pose (Balasana)
Primary Focus: Spinal Decompression & Nervous System Regulation
Expert Insight: This is more than a rest pose; it is a functional “reset” for the fascia (connective tissue) of the lower back. By folding forward, you create a gentle traction effect that increases the space between the vertebrae.
Why it Works (The Science)
Clinical observations suggest that Balasana helps shift the body from the “fight or flight” state. It may support the parasympathetic nervous system.
This is crucial for chronic pain sufferers, because persistent pain often comes from “central sensitization.” In this state, the nervous system stays on high alert.
How to Perform with Precision
- Setup: Kneel on the floor, touch your big toes together, and sit on your heels.
- Execution: Separate your knees about hip-width apart and exhale as you lay your torso down between your thighs.
- Placement: Rest your forehead on the mat. Reach your arms forward to stretch the latissimus dorsi or rest them alongside your thighs to focus purely on the lower back.
Safety & Modifications
Knee Sensitivity: If you feel “pinching” in the knees, place a rolled-up blanket in the crease of the knee joint before sitting back.
The “Elevated” Mod: If your forehead doesn’t reach the floor, use a yoga block. Forcing the head down can strain the neck.
2. Cat-Cow Stretch (Marjaryasana-Bitilasana)
Primary Focus: Segmental Spinal Mobility & Disc Hydration
Why it Works (The Science)
Spinal discs do not have a direct blood supply.
They rely on a process called imbibition.
Imbibition is movement-driven nutrient exchange. The rhythmic transition between flexion (Cat) and extension (Cow) acts as a mechanical pump. It moves fluid and nutrients into the intervertebral discs to keep them supple.
How to Perform with Precision
- Setup: Start on all fours (tabletop position) with wrists under shoulders and knees under hips.
- Cow (Inhale): Drop your belly toward the mat, lift your chin and chest, and gaze upward. Focus on tilting the pelvis
- Cat (Exhale): Round your spine toward the ceiling, tucking your tailbone and drawing your navel toward your spine.
Safety & Modifications
Wrist Pain: If you have carpal tunnel or weak wrists, perform the stretch on your forearms or with closed fists.
Neck Care: Avoid over-extending the neck in Cow pose; keep the movement focused on the mid and lower back.
3. Downward-Facing Dog (Adho Mukha Svanasana)
Primary Focus: Total Posterior Chain Lengthening
Why it Works (The Science)
Lower back pain is frequently a secondary symptom of tight hamstrings. When hamstrings are short, they pull on the sit-bones.. It causes the pelvis to tilt backwards and flattens the natural curve of the lower back. This pose treats the cause by lengthening the entire back of the body.
How to Perform with Precision
- Setup: From the tabletop, tuck your toes and lift your hips high.
- Execution: Push your hands firmly into the mat, spreading the fingers wide. Imagine your body forming an inverted “V.”
- Pedalling: If your hamstrings are tight, “pedal” your feet—lowering one heel at a time—to warm up the fascia.
Safety & Modifications
The “Bent Knee” Mod: It is a common mistake to prioritize straight legs over a straight spine. Keep the knees bent if it helps you keep your back long and flat.
Avoid if: You have high blood pressure (uncontrolled) or severe shoulder instability.
4. Legs Up the Wall (Viparita Karani)
Primary Focus: Lymphatic Drainage & Lumbar Relaxation
Why it Works (The Science)
Gravity usually compresses the spine and pulls blood into the lower extremities. Reversing this flow via passive inversion reduces hydrostatic pressure in the legs and encourages venous return. It allows the iliopsoas (deep hip flexor) to fully release. This is often the “hidden” culprit behind lower back tugging.
How to Perform with Precision
- Setup: Sit sideways as close to a wall as possible.
- Execution: Swing your legs up the wall as you lie back. Your body should form an “L” shape.
- Duration: Stay here for 5–10 minutes. This is a meditative pose; focus on deep, diaphragmatic breathing.
Safety & Modifications
Hamstring Tension: If your hamstrings feel strained, move your hips 3–5 inches away from the wall.
Pro Tip: Place a small, folded towel under your lower back to maintain the natural lumbar curve.
5. Bridge Pose (Setu Bandhasana)
Primary Focus: Posterior Chain Activation & Pelvic Alignment
Expert Insight: Many cases of chronic lower back pain are actually “compensation symptoms.” When the glutes are weak (often due to prolonged sitting), the lumbar spine is forced to overwork to stabilize the torso. The Bridge Pose “re-educates” the glutes to take back their load-bearing role.
Why it Works (The Science)
A study published in the Journal of Physical Therapy Science indicates that strengthening the gluteus maximus and transverse abdominis significantly reduces the load on the intervertebral discs.
By lifting the hips, you engage the posterior chain, creating a natural “corset” of muscle that supports the lower spine.
How to Perform with Precision
- Setup: Lie on your back with knees bent and feet flat on the floor, hip-width apart. Ensure your heels are close enough that you can touch them with your fingertips
- Activation: Press your feet and arms firmly into the mat. As you exhale, lift your hips toward the ceiling.
- Alignment: Keep your thighs and feet parallel—do not let the knees splay outward.
- Hold: Maintain the lift for 5–10 deep breaths, focusing on expanding the chest toward the chin.
Safety & Modifications
The “Pillow” Mod (Beginner): If you find it difficult to maintain the lift, place a yoga block or a firm pillow under your sacrum (the flat bone at the base of your spine) for a “Supported Bridge.”
Avoid if: You have a recent neck injury or are in the late stages of pregnancy (unless cleared by a doctor for supported versions).
Pro Tip: Do not squeeze your glutes excessively hard. Focus instead on “rooting” through your inner heels to engage the deep stabilizer muscles.
6. Sphinx Pose (Salamba Bhujangasana)
Primary Focus: Passive Lumbar Extension & Postural Correction
Expert Insight: For those who spend hours hunched over a desk, the spine stays in constant “flexion.” Sphinx pose provides a safe, controlled way to introduce extension, which helps re-center the intervertebral discs.
Why it Works (The Science)
Unlike deeper backbends, Sphinx pose allows for a “passive” extension of the lumbar spine. This reduces pressure on the posterior part of the spinal discs. Clinical research into the McKenzie Method for back pain frequently utilizes similar extension-based movements to alleviate radiating nerve pain (sciatica).
How to Perform with Precision
- Setup: Lie on your belly with legs extended behind you.
- Alignment: Place your elbows directly under your shoulders, forearms flat on the mat and parallel.
- Action: Gently press your pubic bone into the floor and lift your chest. Think of pulling your chest forward through your arms rather than just pushing up.
Safety & Modifications
Pressure Check: If you feel a “sharp” pinch in the lower back, move your elbows further forward to decrease the angle of the curve.
7. Thread the Needle (Sucirandhrasana)
Primary Focus: Thoracic Mobility & Piriformis Release
Why it Works (The Science)
Back pain is often caused by a “frozen” mid-back (thoracic spine). When the mid-back cannot rotate, the lower back (which is designed for stability, not rotation) tries to compensate, leading to strain. This pose restores rotation to the upper and mid-spine while stretching the muscles around the shoulder blades.
How to Perform with Precision
- Setup: Start in a tabletop position (on all fours).
- Action: Reach your right arm toward the ceiling, then “thread” it under your left arm, resting your right shoulder and ear on the mat.
- Hold: Keep your hips squared and high over your knees. Breathe into the space between your shoulder blades.
8. Seated Forward Fold (Paschimottanasana)
Primary Focus: Myofascial Release of the Posterior Chain
Why it Works (The Science)
This pose targets the fascia that runs from the soles of your feet up to your calves, hamstrings, and across the entire back. Tension in any part of this chain creates a “tug-of-war” effect on the lumbar vertebrae. Stretching this entire line provides holistic relief.
How to Perform with Precision
- Setup: Sit with legs extended straight in front of you.
- Action: Flex your feet. On an inhale, lengthen your spine; on an exhale, fold forward from the hips, not the waist.
- Hold: Reach for your shins, ankles, or feet. Keep your gaze toward your toes to maintain a long neck.
Safety & Modifications
Herniated Discs: If you have active disc issues, avoid rounding the back. Instead, keep the spine perfectly straight and only tilt forward slightly, or use a strap around your feet.
9. Supine Spinal Twist (Supta Matsyendrasana)
Primary Focus: Spinal Decompression & Oblique Lengthening
Why it Works (The Science)
Twisting creates a “squeeze and release” effect on the spinal tissues. As you rotate, you are gently stretching the quadratus lumborum (QL)—a deep abdominal muscle that is a frequent culprit in localized lower back pain.
How to Perform with Precision
- Setup: Lie on your back and hug your knees into your chest.
- Action: Drop both knees to the left side while extending your right arm out in a “T” shape.
- Alignment: Try to keep both shoulders grounded on the mat. Gaze toward your right hand to complete the spiral.
10. Corpse Pose (Savasana)
Primary Focus: Total Neuromuscular Release
Why it Works (The Science)
Chronic pain often leads to “muscle guarding,” where the brain keeps muscles slightly contracted even at rest to “protect” the area. Savasana is a clinical tool for Progressive Muscle Relaxation. It signals the brain to drop the guarding reflex, allowing for genuine blood flow and tissue recovery.
How to Perform with Precision
- Setup: Lie flat on your back. Let your feet splay open, and your arms rest at your sides, palms up.
- Action: Close your eyes and focus on the breath. Scan your body for any hidden tension—especially in the jaw, brow, and lower back—and consciously release it.
- Duration: Stay for 2–5 minutes. This is the most important part of the routine for long-term healing.
To deepen relaxation, explore:
Yoga for Stress and Anxiety: A Natural Way to Calm the Nervous System
15-Minute Daily Yoga Routine for Back Pain
- Child’s Pose — 1 min
- Cat-Cow — 2 min
- Downward Dog — 1 min
- Bridge Pose — 2 min
- Thread the Needle — 2 min/side
- Spinal Twist — 1 min/side
- Legs Up the Wall — 3 min
- Savasana — 2 min
Results timeline:
- 1 week: Reduced stiffness
- 3 weeks: Improved flexibility
- 6–8 weeks: Significant pain reduction
When Is the Best Time to Do Yoga?
Timing matters more than most people think.
Morning Yoga vs Evening Yoga: Which Is the Best Time to Do Yoga for Your Body?
Complementary Habits for Faster Relief
Yoga works best when combined with:
Walking → improves circulation
Emotional Benefits of Walking: Why Movement is Medicine
Mindfulness → reduces pain sensitivity
10 Simple Mindfulness Exercises for Busy Professionals (2026 Guide)
How to relieve back pain naturally at home?
To relieve back pain naturally:
- Practice yoga daily (10–15 minutes)
- Stretch tight muscles (hamstrings, hips)
- Strengthen core and glutes
- Maintain proper posture
- Reduce stress with breathing exercises
Consistent movement is more effective than rest.
Key Takeaways
- Yoga is clinically proven to reduce back pain
- It addresses root causes—not just symptoms
- A simple 15-minute routine is enough
- Consistency is more important than intensity
Frequently Asked Questions (FAQ)
1. Can yoga cure back pain permanently?
Yoga can significantly reduce or eliminate chronic back pain if practiced consistently, but results depend on underlying conditions.
2. How often should I do yoga for back pain?
At least 5–6 days per week for best results.
3. Which poses should I avoid?
Avoid:
- Deep backbends
- Forceful forward folds
- Twists with pain
4. Is yoga better than physiotherapy?
Studies show yoga can be as effective as physiotherapy for chronic back pain, but severe cases need medical guidance.
5. How long before I see results?
Most people notice improvement within 2–4 weeks.
Is yoga good for lower back pain?
Yes, yoga is highly effective for lower back pain. Research published in the Annals of Internal Medicine shows yoga can be as effective as physical therapy for chronic lower back pain.
Author Bio
Jesuraj is a wellness researcher and health optimization specialist focused on the intersection of modern neuroscience and traditional herbalism.
He dedicates extensive time to analyzing clinical trials, meta-analyses, and third-party lab reports to deliver evidence-based, unbiased health insights. His work bridges ancient healing systems with modern brain science—helping readers improve mental clarity, physical resilience, and long-term vitality through strategic lifestyle practices and targeted supplementation.
Final Thoughts
Back pain is not something you have to live with.
With the right combination of movement, awareness, and consistency, your body has the ability to heal itself.
Start small. Stay consistent. And let your body do what it was designed to do—move, adapt, and recover.

